


Taking a look at the use and setup of the seven mechanical mates in SOLIDWORKS
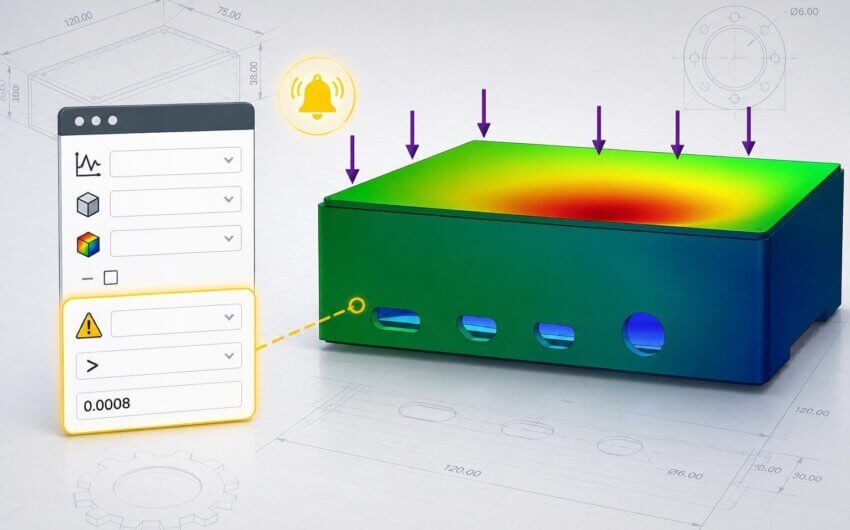
Choosing which mates to use when building your assemblies in SOLIDWORKS depends on what you want to do with the assembly itself. If the goal is to lock the assembly into specific positions for renders, then standard mates will usually be robust enough to make that a simple process. If you’re trying to mimic real-life motion, however, using standard mates can get a little complex. To make things simpler, SOLIDWORKS has a set of mates, called mechanical mates, that can be used to mimic real-world interaction that might be difficult to simulate with just the standard mates. You can use mechanical mates for components such as cams, gears, and universal joints. Even if you can create the desired motion by just using standard mates, the ease and speed of mechanical mates make them a better option in most cases. Additionally, using mechanical mates instead of multiple standard mates will speed up any analysis you do on the assembly since there won’t be a need to solve for the redundant mates. Let’s go over the seven mechanical mates and how you can use them in your own assemblies.
Cam-Follower Mates
The cam mate is the first of the mechanical mates listed in the Mates PropertyManager and is used, as you might imagine, to relate a cam’s rotatory motion to the linear motion of a follower. In SOLIDWORKS, creating this mate is done by simply selecting the closed loop of tangent faces that define the cam and the face or point on the follower that will be in contact with the cam. After that, the only additional control you have over the mate is to flip its alignment to make sure that the follower is on the correct side of the cam. From a design perspective, this means that if you want to use a cam mate, you need to make sure that the cam component has a closed loop profile made up of tangent lines, arcs, and splines and that the follower component has a cylindrical face, planar face, or vertex to mate to the Cam. Once in the FeatureTree, the mate will display as either a CamMateCoincident or CamMateTangent mate, depending on the type of follower you’re using. It will make sure that the cam and follower components are always in contact as they rotate or move in the graphics area.

Slot Mates
The next mate you can find in the Mates PropertyManager is the Slot Mate. As its name implies, it allows you to mate components to a slot, so that the component will always be inside and tangent to the slot. For the selections, you’ll need to select a slot as your first entity and then a cylindrical face, axis, or even a second slot as a mate. Once you’ve made your selections, you can add an additional constraint to the second entity to determine if it’s free to move inside the slot or constrained to a specific part of it. Specifically, you can set up the constraint to keep the second entity locked to the center of the slot, or use a distance or percentage value to lock the second entity to a certain point in the slot. Since this additional constraint can be added later by editing the mate, it allows for more flexibility when creating configurations to show specific setups or simulate motion.

Hinge Mate
The hinge mate acts as a combination of a coincident and concentric mate to simulate the behavior of a hinge. Since its base is a coincident and concentric mate, you’ll need to select a pair of circular or cylindrical faces and the pair of touching coincident faces that compose the hinge. The hinge mate also gives you an option to limit the angles that the hinge can rotate through, adding a bit more design intent to the assembly.

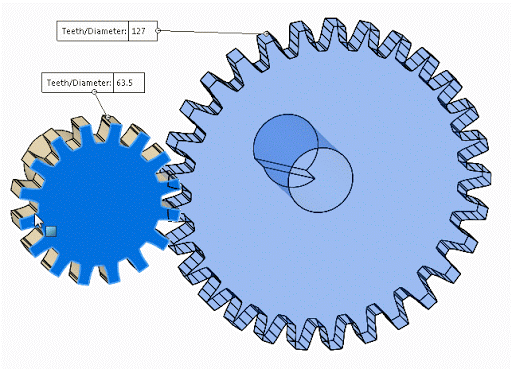
Gear Mate
The SOLIDWORKS Gear Mate is used to simulate the motion of interlocking gears. This is done by relating the rotary motion of one cylindrical entity with another with a ratio. This ratio determines how much one entity turns compared to the other and is set to the size of each component by default. This makes setting up realistic looking gear interactions much simpler and reduces the load on your machine that physical dynamics would create. Keep in mind, however, that the mate moves the gears based on the set ratio, not where they actually interlock, so the mate shouldn’t be relied upon as proof that the gears interlock correctly. Since the ratio can be edited and reversed, the gear mate is also a great way to easily relate to objects that need to rotate together, no matter what their actual geometry is.
Rack and Pinion Mates
Similar to how the gear mate transfers rotary motion between two components in order to simulate how gears interact, the rack and pinion mate transfers the rotary motion of one component into linear motion on a second component to simulate how a rack and pinion interact. To set up the mate, you simply need to select a linear edge or line on the rack component, and then a cylindrical face or circular edge on the pinion component. The mate will then relate the motion based on either the pinion pitch diameter or the rack travel distance. The default values for either method will be determined by the size of the components, but the value can, of course, be overridden, or even reversed, in order to get the exact motion you’re looking for. 
Screw Mate
In order to properly simulate the behavior of a screw, the screw mate in SOLIDWORKS constrains two components concentrically, then adds a relationship between rotary and linear motion akin to tightening a screw. This can be easily conceptualized by considering how a screw goes into a hole, but since those components will usually be locked down in an assembly, you’ll most often use the screw mate for things like a screw-driven linear rail.

Universal Joint Mate
The final mechanical mate in SOLIDWORKS is the Universal Joint mate. In the real world, a universal joint is a type of joint that allows you to connect two rods at an angle and still transfer their rotational energy. This can be achieved in SOLIDWORKS by building the connecting components, but using the Universal Joint mate lets you simulate this interaction without the additional components, allowing you to use smaller files for simulations or presentations to get faster and smoother results. Setting up the mate is also very simple, requiring just the selection of two cylindrical faces. By default, the components will then rotate around the point where their axes intersect, but you can move this point by using the Define Joint Point option. This can be a great way to make sure that the components are correctly aligned, especially if they haven’t been constrained in any other way yet.

To learn more, check out my blog post on Advanced Assembly Mates in SOLIDWORKS!